이전의 파이어베이스를 연결을 다 해주었다면
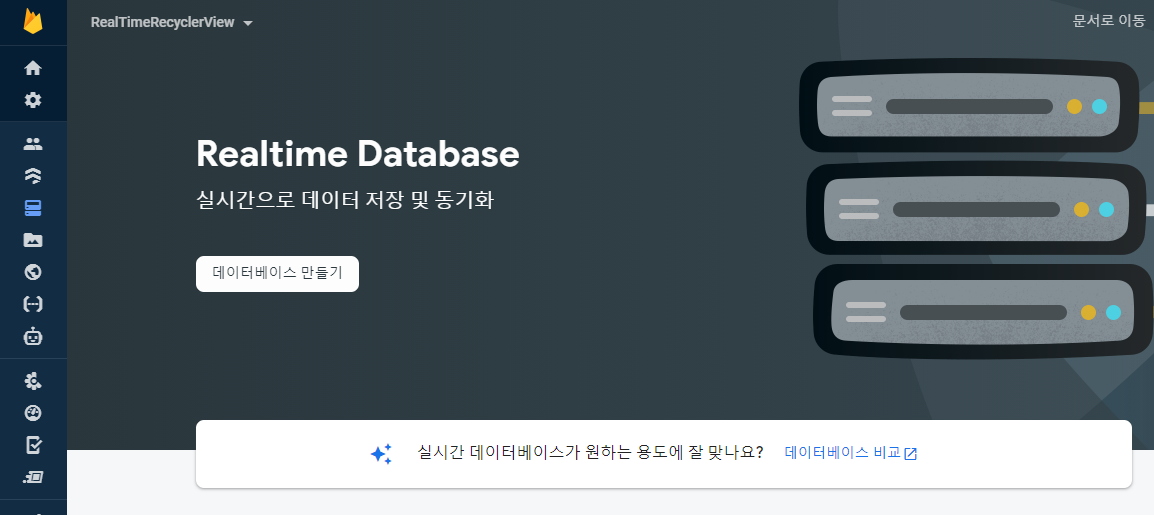
Realtime Database 탭으로 이동해 데이터베이스 만들기를 눌러 생성해줍니다.
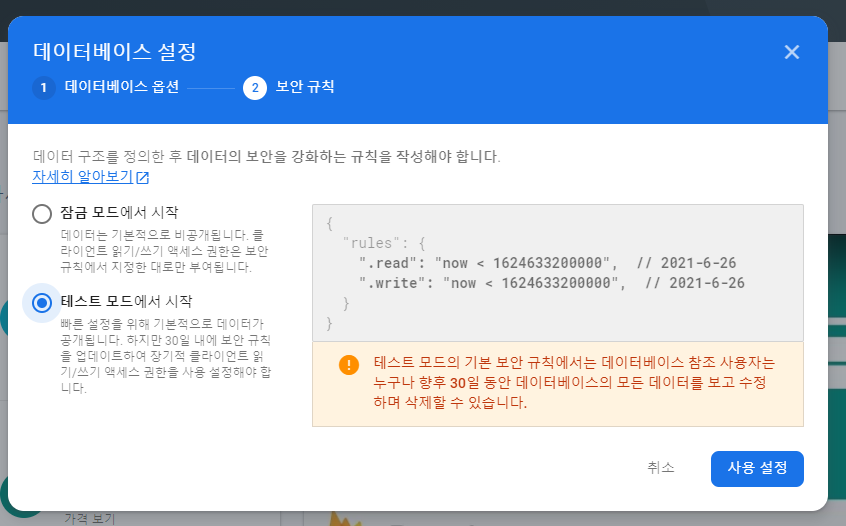
실시간 데이터베이스 위치를 미국으로 설정한 후 다음을 눌러줍니다.

테스트 모드에서 시작으로 설정하여 설정을 완료해 줍니다.
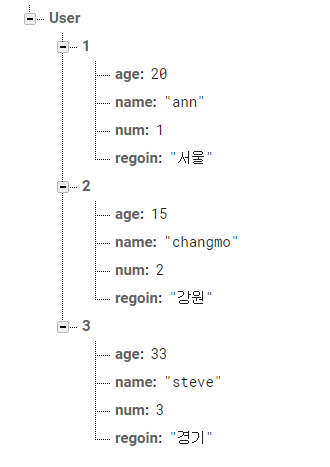
아래 사진의 + 버튼을 눌러 데이터를 추가해줍니다.

데이터를 아래와 같은 형태로 추가해 줍니다. (유저의 나이 이름 지역을 저장해주었습니다.)
안드로이드 스튜디오로 돌아가 java폴더에 data class User.kt 라는 파일을 만들어 realtime database에 넣어 줄 데이터 형식을 만들어 줍니다.
data class User (val name:String = "Name",
                    val age:Int = 0,
                    val region:String = "Region")
User.kt
다음으로 RecyclerView에 Adapter를 연결해 주기 위해 클래스 파일 ListAdapter.kt를 하나 생성해 줍니다.
inner class ViewHolder를 이용하여 list_item에 있는 아이템과 연결해줍니다.
onCreateViewHolder는 RecyclerView의 아이템으로 만들어 두었던 list_item.xml을 LayoutInflater하여 뷰의 형태로 변환시켜 줍니다.
onBindViewHolder는 데이터를 바인딩하여 뷰에 뿌려질 수 있게 뿌려질 데이터를 연결해줍니다.
getItemCount는 화면에 가져올 아이템의 개수를 말하는 것으로 바인딩될 userList.size(개수)를 뜻합니다.
setListData는 후에 observer 패턴을 사용하기 위해 따로 만든 클래스입니다.
class ListAdapter(private val context: Context): RecyclerView.Adapter<ListAdapter.ViewHolder>() {
    private var userList = mutableListOf<User>()

    fun setListData(data:MutableList<User>){
        userList = data
    }

    override fun onCreateViewHolder(parent: ViewGroup, viewType: Int): ListAdapter.ViewHolder {
        val view = LayoutInflater.from(context).inflate(R.layout.list_item,parent, false)
        return ViewHolder(view)
    }

    override fun onBindViewHolder(holder: ListAdapter.ViewHolder, position: Int) {
        val user : User = userList[position]
        holder.name.text = user.name
        holder.age.text = user.age.toString()
        holder.region.text = user.region
    }

    override fun getItemCount(): Int {
        return userList.size
    }

    inner class ViewHolder(itemView: View):RecyclerView.ViewHolder(itemView){
        val name : TextView = itemView.findViewById(R.id.name)
        val age : TextView = itemView.findViewById(R.id.age)
        val region : TextView = itemView.findViewById(R.id.region)

    }

}
ListAdapter.kt
여기서 LiveData를 사용하기 위해 ViewModel을 이용해 보겠습니다.
LiveData란?
android jetpack의 구성요소로 예전에는 데이터가 변할 때 마다 화면을 갱신해주기위해 이벤트를 각각 넣었었는데 Livedata를 이용하면 데이터 값을 자동으로 관찰하여 데이터가 변경되었을 때 화면을 변경시켜주는 아주 편리한 기능입니다.
먼저 viewmodel과 livedata를 사용하기 위해 build.gradle(app)에 라이브러리를 추가해줍니다.
 def lifecycle_version = "2.3.1"
    // ViewModel
    implementation "androidx.lifecycle:lifecycle-viewmodel-ktx:$lifecycle_version"
    // LiveData
    implementation "androidx.lifecycle:lifecycle-livedata-ktx:$lifecycle_version"
그 후 ViewModel클래스를 만들기 전 Repository 클래스 파일(Repo.kt)을 하나 만들어줍니다.
*Repository : datasource를 캡슐화 하는 것
class Repo {
 	fun getData(): LiveData<MutableList<User>> {
        val mutableData = MutableLiveData<MutableList<User>>()
        val database = Firebase.database
        val myRef = database.getReference("User")
        myRef.addValueEventListener(object : ValueEventListener {
            val listData: MutableList<User> = mutableListOf<User>()
            override fun onDataChange(snapshot: DataSnapshot) {
                if (snapshot.exists()){
                    for (userSnapshot in snapshot.children){
                        val getData = userSnapshot.getValue(User::class.java)
                        listData.add(getData!!)

                        mutableData.value = listData
                    }
                }
            }
            override fun onCancelled(error: DatabaseError) {
                TODO("Not yet implemented")
            }
        })
        return mutableData
    }
}
Repo.kt
그다음 ViewMoldel 파일을 하나 생성(ListViewModel.kt)하여 repository를 연결해줍니다.
class ListViewModel : ViewModel() {
    private val repo = Repo()
    fun fetchData(): LiveData<MutableList<User>> {
        val mutableData = MutableLiveData<MutableList<User>>()
        repo.getData().observeForever{
            mutableData.value = it
        }
        return mutableData
    }
}
ListViewModel.kt
viewModel은 repo에 있는 데이터를 관찰하고 있다가 변경이 되면 mutableData의 값을 변경시켜주는 역할을 합니다.
마지막으로 MainActivity로 돌아가서 RecyclerView와 Adapter를 연결해줍니다.
class MainActivity : AppCompatActivity() {
    private lateinit var adapter:ListAdapter
    private val viewModel by lazy { ViewModelProvider(this).get(ListViewModel::class.java) }

    override fun onCreate(savedInstanceState: Bundle?) {
        super.onCreate(savedInstanceState)
        setContentView(R.layout.activity_main)

        adapter = ListAdapter(this)

        val recyclerView : RecyclerView = findViewById(R.id.recyclerView)
        recyclerView.layoutManager = LinearLayoutManager(this)
        recyclerView.adapter = adapter
        observerData()

    }

    fun observerData(){
        viewModel.fetchData().observe(this, Observer {
            adapter.setListData(it)
            adapter.notifyDataSetChanged()
        })
    }
}
리사이클러뷰와 어댑터를 연결해주고
viewModel에 있는 fetchData().observe를 이용해 데이터가 변경되었을 때 자동으로 바인딩을 변경하여 적용해줍니다.
이렇게 작성 후 에뮬레이터로 실행을 한번 해보면
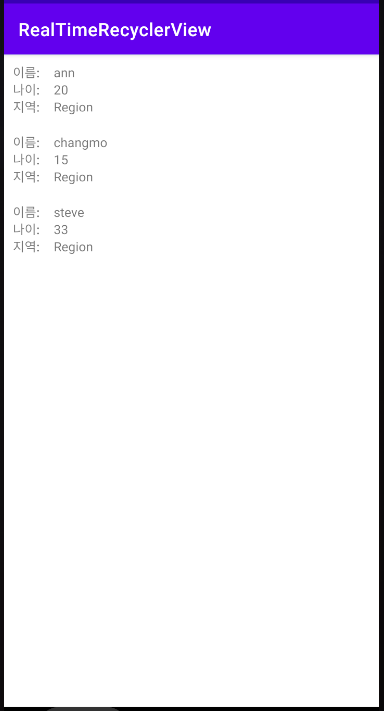
firebase database에 저장이 된 데이터들을 리스트 형태로 나타나지는 것을 확인 할 수 있습니다.
'소프트웨어 > 안드로이드[Kotlin]' 카테고리의 다른 글
| [Kotlin] RecyclerView + LiveData, Firebase Realtime Database 읽어오기[1] (0) | 2021.05.27 |
|---|
